


Custom safety tags: A step by step design guide
Custom safety tags are one of the best ways to manage risks and support a safe working environment. Follow this step-by-step guide for creating your own custom tags and take control of your organisation's safety.
Many work environments are full of mechanical, electrical, and even chemical resources that are prone to causing threats towards employees. Alongside vigorous training and regular testing of equipment, custom safety tags are one of the best ways to mitigate these threats and support a safe working environment for all.
At REGALTAGS, we know a thing or two about tagging. But nobody knows your own processes better than you. That’s why we’ve developed the Custom Tag Builder, allowing you to create your very own critical tag.
Whether you need a custom flange tag, inspection tag, isolation tag, or any other type of tag, follow this step-by-step guide, and take control of your organisation’s safety.
Step 1: Decide if your tag is needed for a multiple stage process
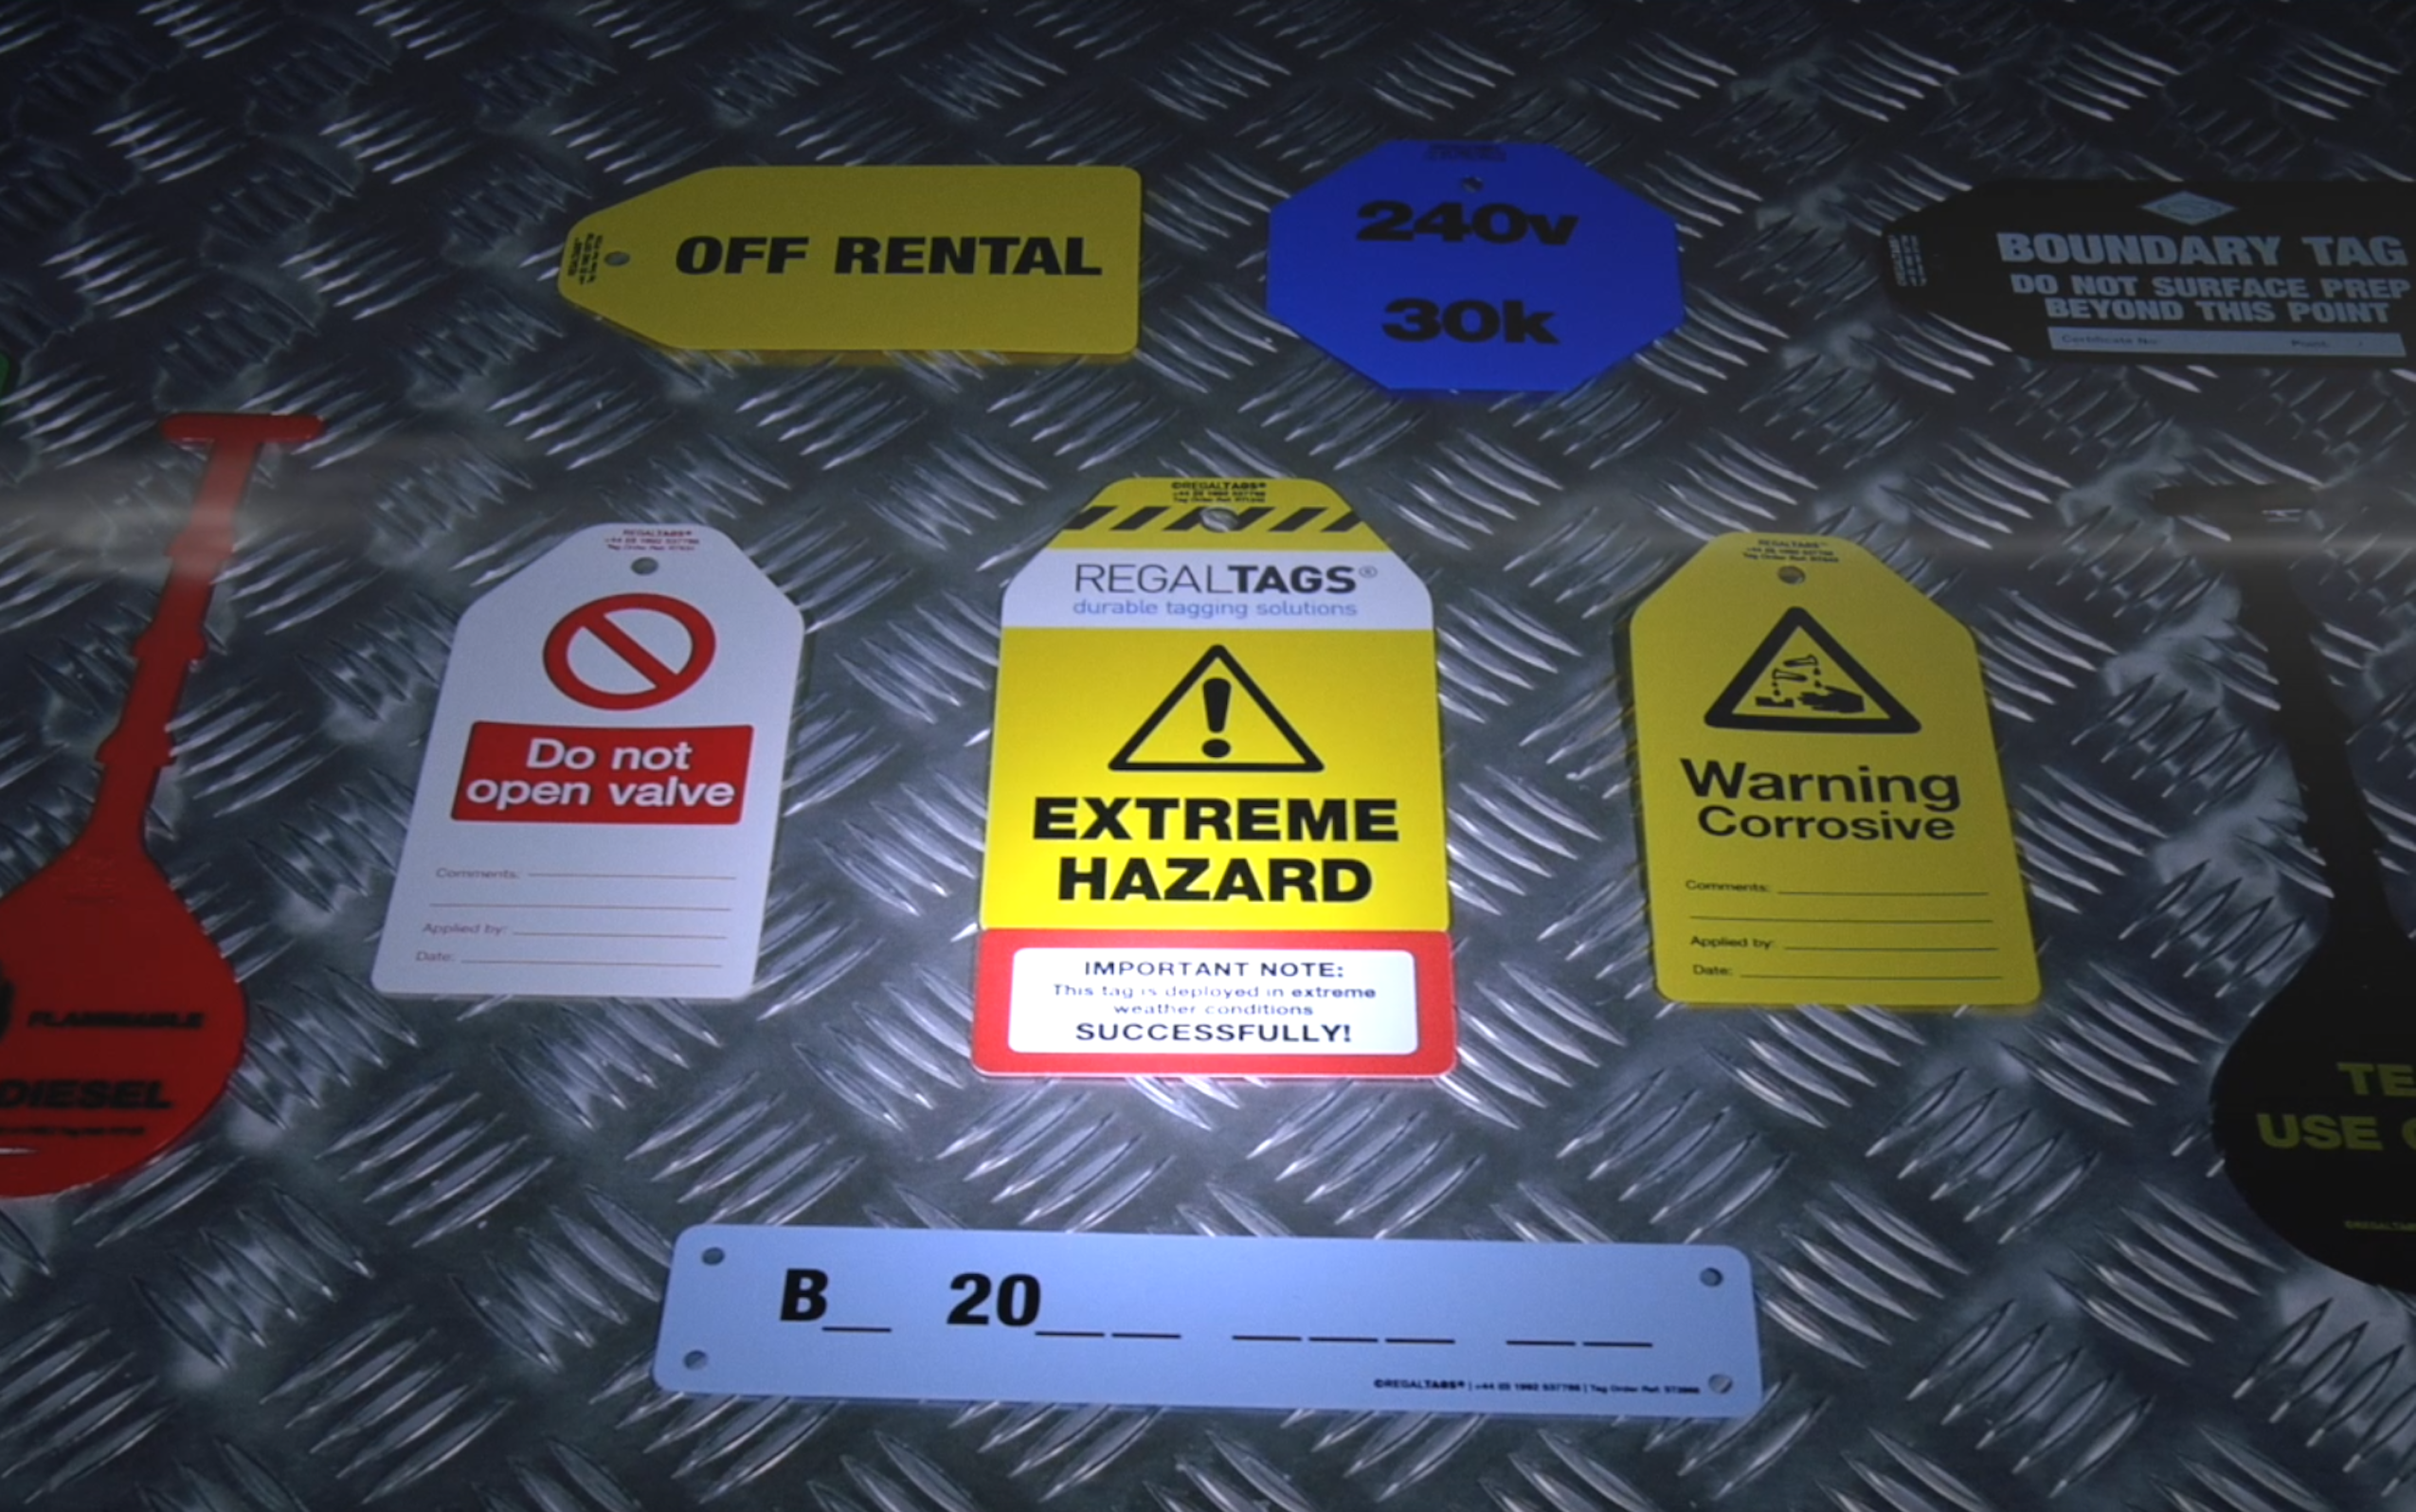
The first step in creating your customised safety Tag is about understanding what function will have. For example, a simple ID tag is there to display information about whatever it is attached to. A contrasting example would be flange tags which are more complex. These are used to manage every step through a flange inspection process track the status of each stage.
So, ask yourself this: Does my tag need to cater for a multiple stage process?

If yes: Select how many parts your multi-stage tag needs
This will depend on the number of steps your process requires and will determine the number of perforated tear-off sections your tag will provide. By ensuring no step is missed out, employees have an easy-to-follow tag that fits seamlessly into your existing processes.

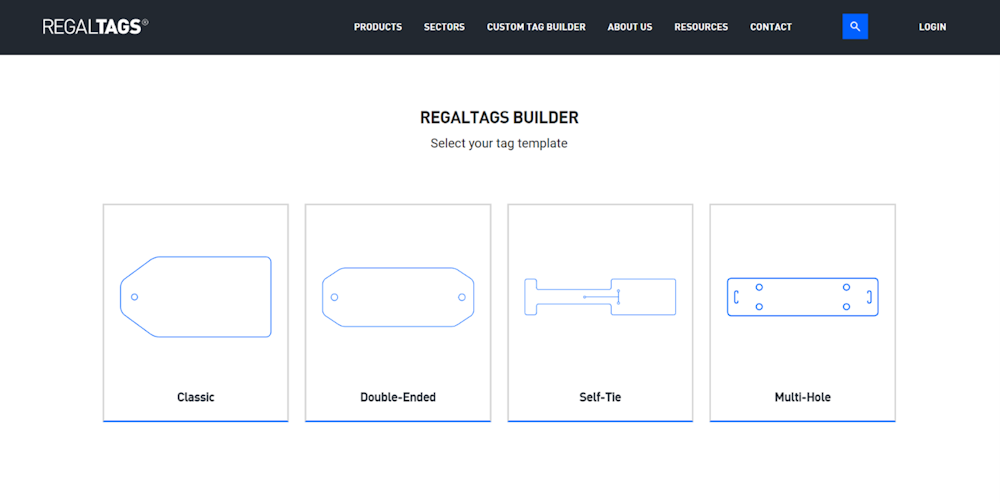
If no: Select the tag layout your process needs
If a single part tag is all your operation needs, consider where you and using this and how you will attach it. A self-tie tag is a great way to quickly attach a tag for shorter-term applications. A single hole option provides a more reliable but simple fixing method through a cable tie or similar. Multiple holes allow for a longer-term application, such as ID markers for pipes and cables. Our custom tag builder gives you the choice between the four following options:
- Option 1 - Classic
- Option 2 - Double-Ended
- Option 3 – Self-Tie
- Option 4 – Multi-Hole
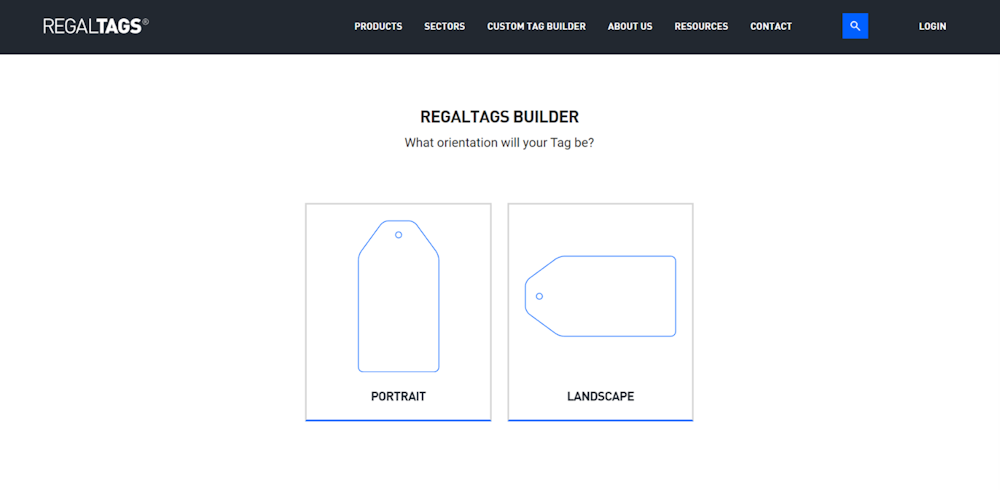
Step 2: Portrait vs Landscape
For processes that need a fair amount of information recorded, think about the field lengths and how they’d fit/ look on both landscape and portrait tags. You may find difficulty recording extra details per available field if a portrait tag is used.
If short and concise information needs to be included, such as bullets or a table, a portrait tag may be efficient. However, for longer, more complex pieces of information, landscape will be required to fit what’s needed and ensure the information is legible and easy to read.
Step 3: Design your custom tag
Once you’ve selected the type and orientation of your custom safety tag, it’s time for the real customisation. By having full control over what’s present on the tag, you can highlight specific messages designed to control hazards, record crucial information, and reinforce brand values.
- Messaging – Most tags will have a signal word that stands out and is the first piece of information to be read. This could be “Danger” or “Caution” alongside a safety symbol, used to promote safety and remind employees of a potentially hazardous situation.
- Custom tag fields – Crucial information that should be recorded alongside your process can be included on your custom safety tag. The “Name” of the employee and “Date” of the completed inspection for example. A “Pass” or “Fail” tick box could be appropriate too, as well as a “Part Number” field. The best thing about custom safety tags is that there are no limitations. Whatever your process needs, you can include.
- Colours and branding – Custom safety tags allow you to choose the colours used on your tags, as well as upload logos and other images. This can be extremely useful when colour coding certain processes to ensure users are filling the correct part of the tag in. Custom flange tags are good example of this. For instance, your multi-part tag may have 3 parts labelled “Flange Tightened”, “Flange Inspected” and “Flange Broken”. To make things even clearer, these could have individual background colours in order of green, yellow and red.

Need help with your custom safety tag?
Using the information above, why not start designing your custom tag today. If you need any help along the way, drop us a message – we’re always happy to answer any questions.
Once complete, our Custom Tag Builder will allow you to share your creation with us, a colleague, or both. If you’re looking for specialist input, we’ve got you covered. Simply sketch your concept and share it with our design team through the Custom Tag Builder. We’ll bring your ideas to life on a custom safety tag perfect for your operations’ needs.
Subscribe
Join 10,000+ others receiving our monthly updates. Free Tag knowledge delivered straight to your inbox.